Mix up your multiplication routine for the new year with three fun math activities children can do using paper plates! These fun, no-mess activities will help little ones practice basic multiplication facts. Read on to learn how you and your students can multiply math skills with paper plate multiplication!
We love math games that are easy to prepare and fun to play! The following paper plate multiplication activities are so simple, yet they provide both a tactile and visual way for kids to conceptualize multiplication facts. In addition to several paper plates, you will need a handful of everyday items you can easily find in your classroom or at home. We'll highlight the materials you need for each activity below.
Be sure to tag @superteacherworksheets on social media if you and your students try out any of these paper plate multiplication activities! We love seeing the creative ways you and your class adapt the ideas and activities we feature on our blog to your own learning environment!
Here's a fun math activity that will help you put a creative spin on multiplication tables. In addition to two paper plates, be sure you have a pair of scissors, a marker, a ruler, a pencil, and a brass paper fastener on hand for this activity. Here's what to do:
First, label one of the paper plates with the times table you want to practice, such as the 5 times table. Write out a partial math fact to the left of the center of the paper plate, 5 x ... like we did in the photo below:

Skip enough space to accommodate the second number in the math fact and write an equal sign and question mark, = ?, like we did here:

Now, turn your attention to the second paper plate. Divide the paper plate into twelve equal sections using a ruler and a pencil.
Use a marker to label the inside sections with the numbers 1 through 12. Label the outside sections with the answer to each multiplication fact, if multiplied by the number you are using in your times table. For example, since 5 x 1 = 5, you would write the number 5 on the outer section of the paper plate where the 1 is on the inside.
When you have finished, your base plate should look like this:

Next, lay the first paper plate on top of your base plate. Do not fasten them together just yet. Line up the partial equation you wrote on the top plate with the numbers on the bottom plate. When you are sure your numbers are aligned, draw a box where the second factor in the multiplication fact should appear. Cut out the box with a pair of scissors. Also cut two knobs along the rim of the plate that you can fold back to reveal the answers:

To maximize multiplication practice and foster group learning, you can assign specific multiplication tables to different children. Once each child makes his or her multiplication table and practices with it, he or she can swap with other children to practice different multiplication tables.
This multiplication activity is similar to the spinning multiplication tables above, without the "spinning" element. You will still need two paper plates, a pair of scissors, a marker, a ruler, and a pencil, but instead of using a brass paper fastener to create a spinning wheel, we'll opt for some glue to hold the plates firmly in place.
First, label one of the paper plates with the times table you want to practice, such as the 2 times table. Then use a marker to write 12 multiplication facts around the rim of the paper plate, such as: 2 x 1 = ; 2 x 2 = ; 2 x 3 = ; 2 x 4 = ; 2 x 5 = ; 2 x 6 = ; 2 x 7 = ; 2 x 8 = ; 2 x 9 = ; 2 x 10 = ; 2 x 11 = ; and 2 x 12 = . Cut little knobs in between each math fact that you can fold back to reveal the answers.

Next, divide the second paper plate into twelve equal sections using a ruler and a pencil. Write the answer to each of the math facts you wrote around the rim of the first plate around the rim of the second plate, one in each of the twelve sections so they are evenly spaced.

Finally, line up the multiplication facts on the top plate with the corresponding answers on the bottom plate. Once you are sure the plates are aligned correctly, adhere them together with a little glue or tape.

Now students can practice their multiplication facts, revealing each answer as they work around the circle!
Weave a multiplication web with this fun math activity that only requires one paper plate, a marker, a ruler, and a pencil.
Again, you will want to label your paper plate with the times table you want to practice, say the 7 times table. Next, divide the paper plate into twelve equal sections using a ruler and a pencil. You can go over these lines with a marker to make them thicker. Also draw a circle on the inside of your plate:

Now, label the sections of the inside circle with the numbers 1 through 12.

At this point, kids can multiply the number in the center of the circle with each number, 1 through 12, writing the answer to each multiplication fact in the outer section of the corresponding slice of the circle:

Tip: You can have children write their answers on sticky notes and place them around the rim of the plate so you can reuse the plates for additional practice!
Which one of these paper plate multiplication activities will you and your students try? Let us know in the comment section below!
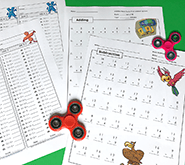
If you're looking for fun multiplication activities to do with little ones, check out the Super Teacher Worksheets Basic Multiplication Collection. You will find printable activities, multiplication games, quizzes, flashcards, math mystery pictures, and much more!
You may also like: