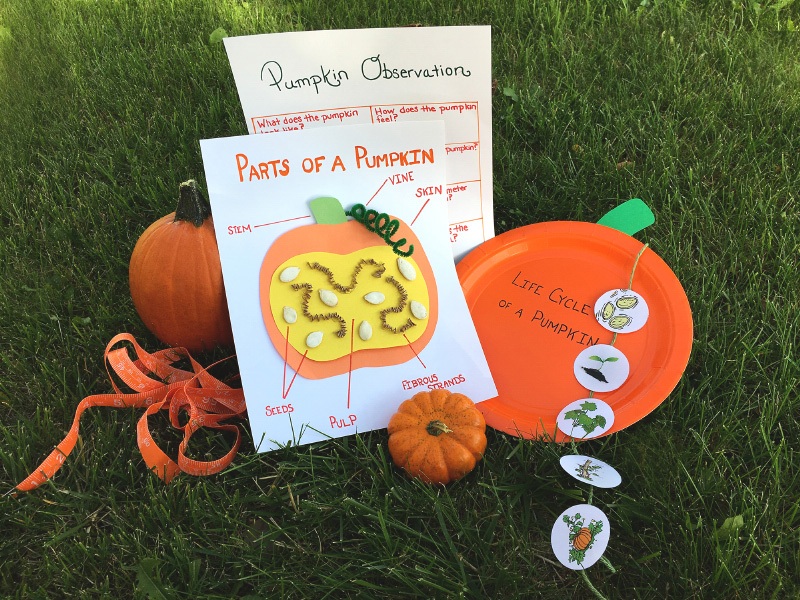
Check out these perfect pumpkin activities we hand-picked just for you! Read on to find out how you can add some autumn fun to your classroom!
We've put together three adorable pumpkin activities that we think you're gonna love using in your classroom this fall. Teach the parts of a pumpkin with a fun craft, discover the life cycle of a pumpkin using a colorful display, and reinforce math skills with a pumpkin observation activity. You and your students will love these seasonal activities! They might even inspire a trip to the pumpkin patch!
The purpose of this hands-on activity is to teach your students the different parts of a pumpkin by having them make their own pumpkin craft. You'll need a couple basic supplies for this easy activity, which you can find at your local craft store or even the dollar store.
Materials:
(Note: For this activity, it will be easiest if you create a sample of the project beforehand, so you can show your students what the craft is supposed to look like. It will also be helpful if you can provide a pumpkin outline for your students to trace. You can make several of these ahead of time using card stock.)
Instructions:
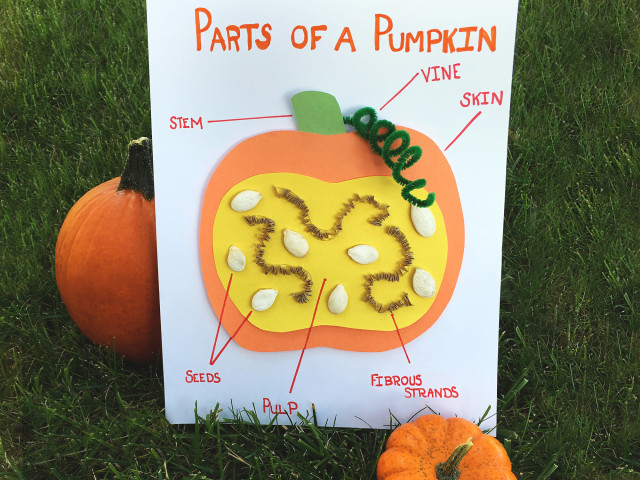
1) Students will cut out a pumpkin shape from the orange construction paper. Then they will cut a circular shape from the yellow construction paper for the pumpkin pulp. Finally, they will cut a rectangular shape from the green construction paper for the stem.
2) Students will glue the paper pumpkin parts together to create a basic pumpkin like the one in our picture.
3) Next, students will glue the crinkle paper and pumpkin seeds onto the yellow pulp of their pumpkin. There's no need to go crazy here! Just a few strands of crinkle paper and a handful of pumpkin seeds will get the idea across.
4) After that, students will curl their pipe cleaner "vines" by wrapping them loosely around their finger. These can be glued to the top of the pumpkin near the stem.
5) Finally, your students will glue their pumpkins to a white piece of paper.
As a class, guide your students through labeling their pumpkins. They can use markers, colored pencils, or crayons to label the seeds, pulp, fibrous strands, skin, vines, and stem. Hang up your students' crafts around the classroom for extra fall-festiveness!
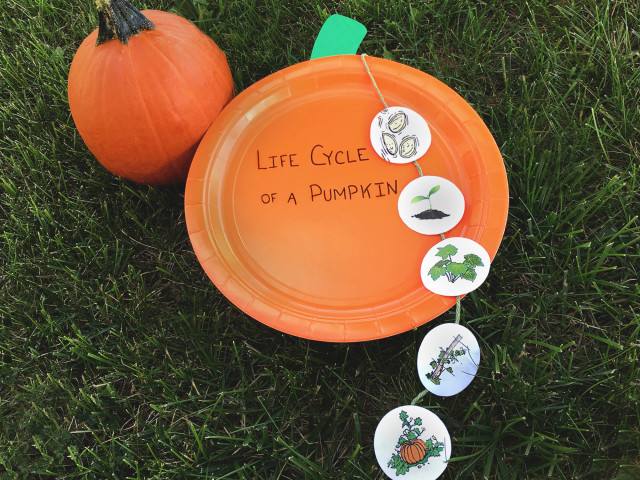
This is a great activity for teaching your class about the life cycle of a pumpkin. There are many variations on this activity, but here's how ours came out, pictured above. You will only need a few basic crafting items to do this activity.
Materials:
(Note: For this activity, you will also need to locate images of each stage in the life cycle of a pumpkin: seed, sprout, plant, vine, and pumpkin. We found our images on ClipArt.com. You'll need to provide a set of these images to each student in your class. We recommend cutting them out ahead of time so they are ready for your students to use.)
Once your students have everything they need, here's what to do:
Instructions:
1) Students will cut out a rectangle from the green construction paper and tape it to the top of their orange paper plate. This will be their pumpkin.
2) Next students will take a piece of green yarn and tape it to the back of the paper stem. It will look like a vine on the pumpkin.
3) On this vine, students will arrange each of their pictures of the pumpkin life cycle in order. The pictures should be arranged so that the beginning of the cycle is closest to the pumpkin.
4) Once the students have arranged their pictures correctly, they can adhere them to the vine/string with a small piece of tape on each.
Ta-da! That's all there is to it! The end result is an adorable paper plate pumpkin that shows the pumpkin life cycle! This is a great craft for you to display in your classroom or send home with your students so they can teach their families something new.
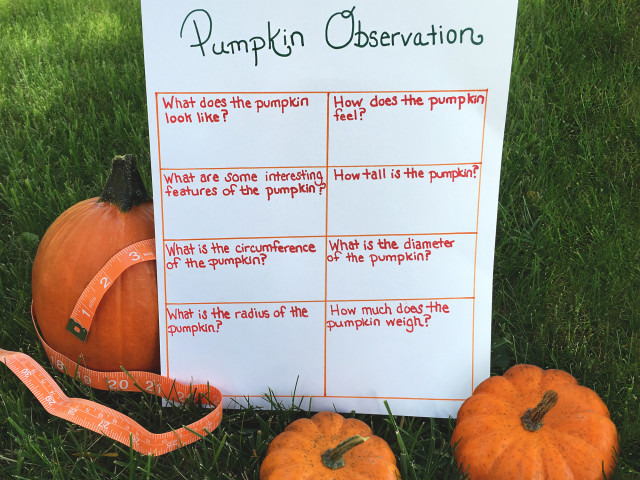
This activity is all about observation and measurement! You can incorporate this hands-on experiment into a science or math lesson. You will only need a couple of items to do this activity with your students.
Materials:
(Note: The best way to do this activity is to put your students in groups, giving each group 2 or 3 pumpkins of various sizes to make their observations. You can decide how many students you'd like in each group, as well as how many pumpkins you'd like to provide.)
Instructions:
On a piece of paper, students will make observations about their pumpkins using criteria and questions that you provide for them. Here are some questions you could give your students as they make their observations:
As you can see by the types of questions listed above, you can tailor this activity toward young learners by asking very basic questions or gear it toward older students with more challenging questions. The point is to get your students thinking, inquiring, and observing using the tools they are given. No matter how you choose to vary this activity, we think it will add the right touch of fall-themed fun to your curriculum!
Did you like our pumpkin activities for kids? Do you have your own to share? Please let us know in the comments section below!
Also, check out the Super Teacher Worksheets Autumn Page for more great ideas!


